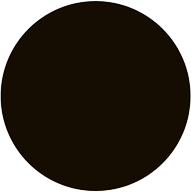
Here’s simple ‘Style’ applied to an Ellipse Shape.
This gives the appearence of a glass eye or camera lens affect.
Most effective style’s are created using extreme combinations. Follow along this series, you’ll see just what I mean.
- Start off with a new document (mine 366×364) , next hit the ‘D’ key on your keyboard to set the foreground to ‘Black’, then from the ‘Toolbar’ choose the ‘Ellipse Tool’ and draw (hold the ‘Shift’ key to constrain to proportion) an ellipse. (Size of my Ellipse is 319×319 pixels)
NOTE: To get the actual size of your shape, Ctrl + click on that particular layer in the ‘Layers Palette’ to select it. Then go ‘Window/Info’ and under the ‘Info’ tab check the actual ‘W: & H:’ values to see if they resemble my values. I only stress this point becuase the a big difference in your values at this stage will produce a different result once you apply the different styles. So try to get close!
If you an exact match, then once you have drawn your shape, hit the ‘T’ key to select the ‘Transform Tool’. With the ‘Info Panel’ still open, click on a corner Transform point and scale in the direction until those values in the ‘Info Panel’ match 319×319.

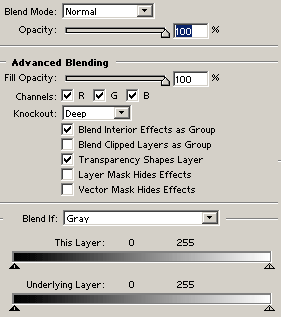
- Next right-click on the shape layer in the ‘Layers Palette’ and choose ‘Blending Options’ from the context menu options.

- Set the Master blending style options as I have captured here.
- Next, set the ‘Drop Shadow’ options as I have captured.
‘Blend Mode’ color =’#000000′. ‘Contour’=’Linear’ from the default contour list..
NOTE: Mouse over the thumbnail contours to a context sensitve description.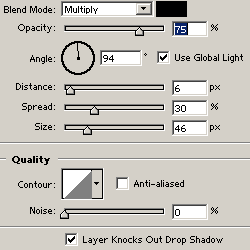
- Next, set the ‘Inner Glow’ options as I have captured.
‘Blend Mode’ color =’#000000′.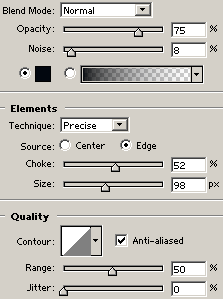
- Next, set the ‘Bevel & Emboss’ as I have captured.
‘Shadow Mode’ color=#000000.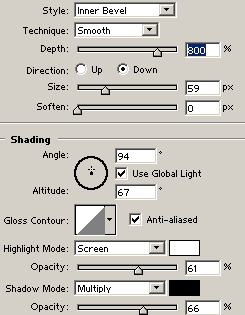
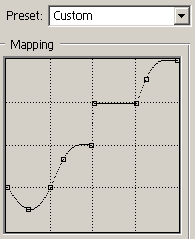
- Next set the ‘Contour’ style.
Again pay attention to the contour used.
To create the ‘Contour’ curve that I used, click on the Contour thumbnail map
 to bring up the ‘Contour Editor’ and recreate what I have captured.
- Next, set the ‘Satin’ style.
Blend Mode color=#ffffff. ‘Contour=’Rounded Shape’ from the default list.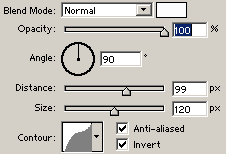
- Next, set the ‘Gradient’ style.
Gradient =’#22A2ED to #ffffff’, ‘Diamond’ style.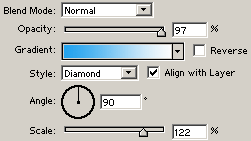
- Finally, set the ‘Stroke’ style.
Gradient =’#000000 to #ffffff’ (Black/White)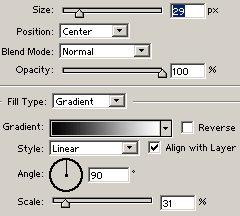
And heres the final result.

