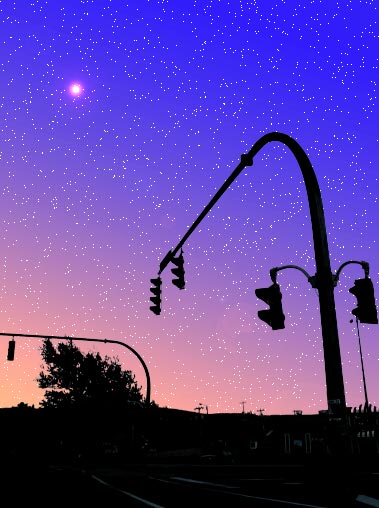
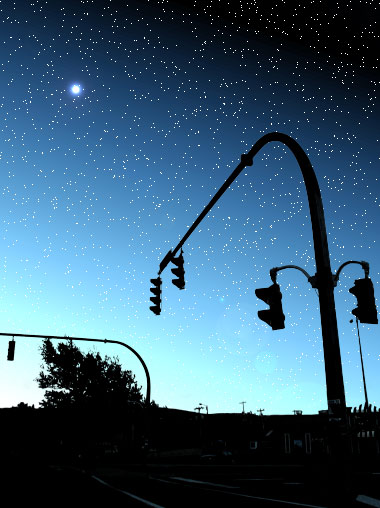
Transform this seemingly dull photo and recreate your own version of a night sky.
Below is the image I took while waiting at an intersection in my sisters car.

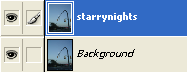
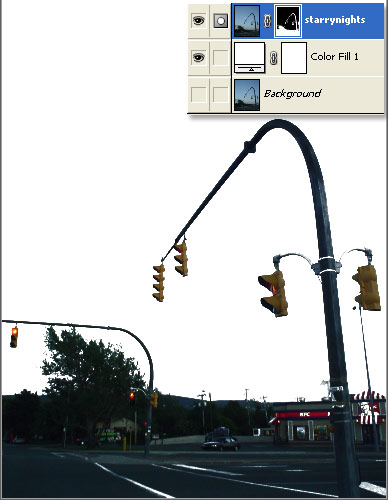
To begin, lets duplicate the ‘background’ layer & rename it to ‘starrynights’ as I have captured below.
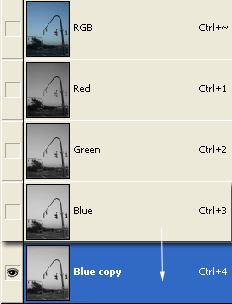
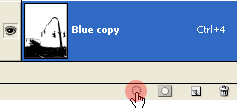
Switch to the ‘Channels Palette’ and duplicate the ‘Blue’ channel so that you now have ‘Blue Copy’ as I have captured below.
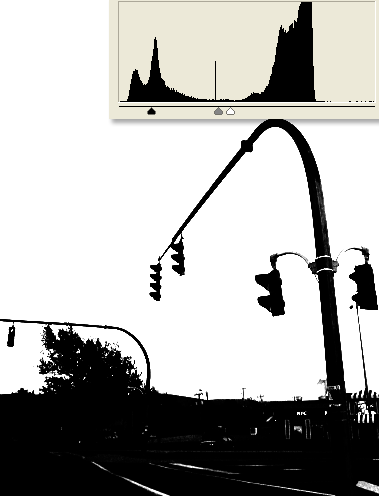
With the ‘Blue Copy’ channel active, go ‘Image/Adjustments/Levels’ or (Ctrl + L / Mac: Command + L) and work the Highligts, Midtones and Dark point sliders until the majority of the background is white as I have captured below.
Still in the Channels Palette, with the ‘Blue Copy’ active, click the ‘Load Channel As Selction’. (Encircled in red)
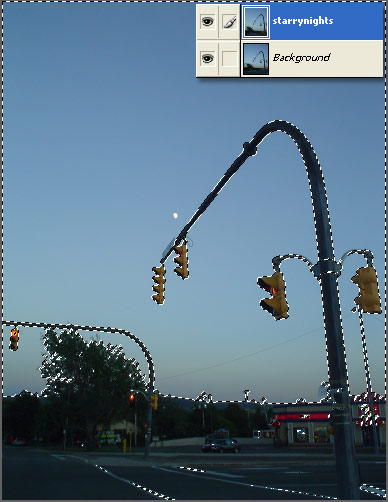
Switch back to the ‘Layers Palette’, with the ‘starrynights’ layer active. Yoou should also see the active selection (marquee) that was loaded from the alpha channel, as captured below.
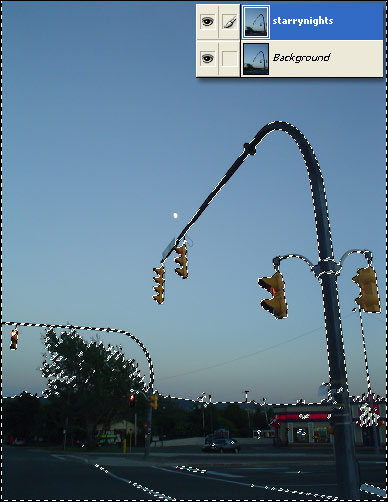
Next, ‘Select/Inverse’ (or ‘Shift + Ctrl + I’ /Mac: “Shift + Command + I”) to inverse this selection.
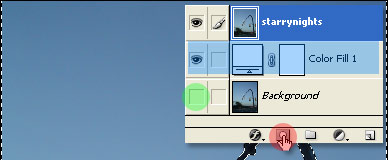
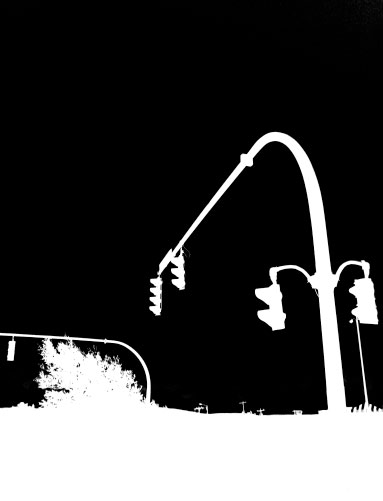
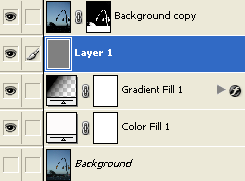
Next, add a Color Fill Layer of white below the ‘starrynights’ layer (encased in blue), hide the original ‘background’ layer (encircled in green), then hit the ‘Add Layer Mask’ icon. (encircled in red).
You should now have the below resulting image with a layer mask attached to the ‘starrynights’ layer.
Next, clean up what the levels command failed to do in the channels palette step earlier.
1. Ctrl + Click (Mac: Command + Click) on the ‘Layer Mask Thumbnail (encased in red) to edit the mask on the fly.
2. Select the Brush Tool (B) & Zoom in to a comfortable level, and for areas of gray shade paint with white (#ffffff).
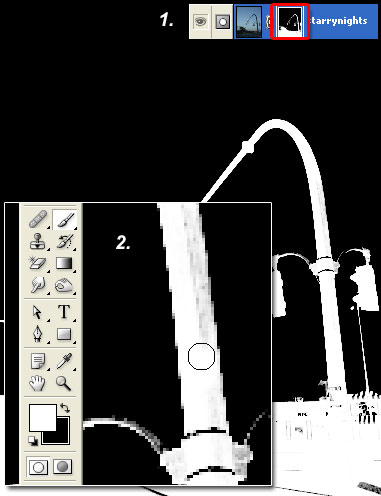
Clean up til your image is smooth (or reasonable) as I have captured.
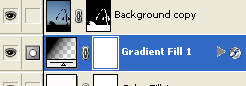
Add a ‘Black to Transparent’ adjustment layer between the ‘background copy’ & ‘Color Fill’ layers.
Almost there!
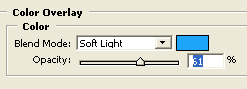
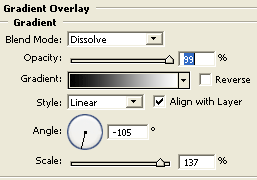
Next, change the Blending Mode of ‘Gradient Fill 1’ to ‘Color Burn’ and add two Blending styles as I have captured below.
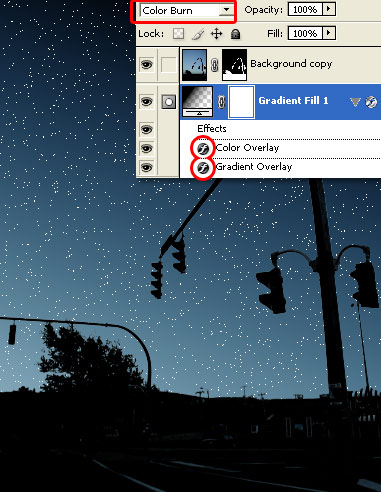
Color Overlay: #1EA4F9
Gradient Overlay: Black,White (#000000,#ffffff)
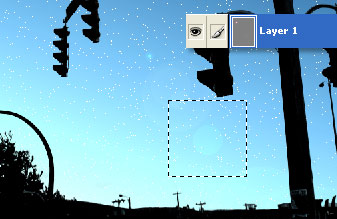
Finally, with the ‘Gradient Fill1’ layer active.
Go to ‘Layer/New/Layer’.

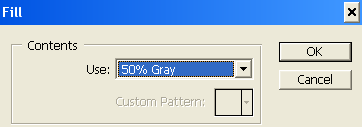
At the next prompt select ‘Soft Light’ color mode and tick ‘Fill with 50% grey’. (encased in red)
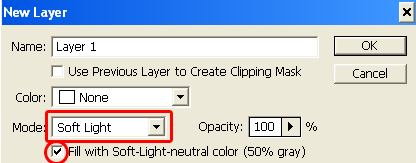
No affect has occurred to the actual document, but here is the layers palette view.
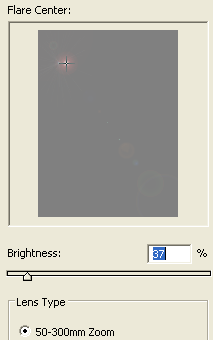
With that ‘Layer 1’ active, go ‘Filter/Render/Lens Flare’ and with the below settings, position the flare to the upper left..
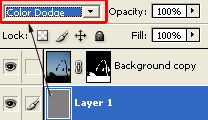
Then change the Blend Mode of that ‘Layer 1’ to Color Burn.
To get this resulting starry night image.
Note: To eliminate some of the artifacts from the lens flare, activate that lens flare (‘Layer 1’) layer, Zoom in & draw a selection around the artifact portion.
Then ‘Shift + F5’ & since that layer was originally created with a fill of 50% grey, choosethe same fill option here.
For variations in color, alter the above ‘Gradient Overlay’ preset thats under the ‘Gradient Fill1’ layer.