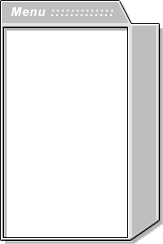
Start with the Pen Tool from the Toolbar, and work your way across. (Hold Shift Key to constrain to a straight line)

Define the shape of your Menu Box as I have done, working your way around to connect to the initial Pen Anchor Point.
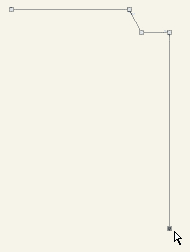
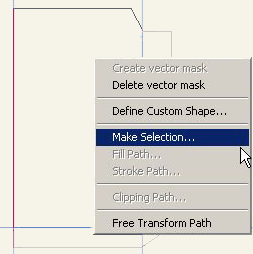
Once you have made the connection to the initial Anchor Point, right click on the new Path Selection and choose ‘Make Selection’.
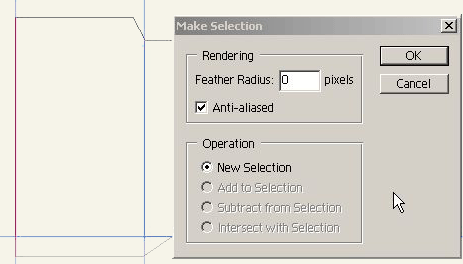
Leave the default settings and click OK.
Try changing the Feather Radius to a higher integer other than the default, and you will notice your corners smooth out.
Try changing the Feather Radius to a higher integer other than the default, and you will notice your corners smooth out.
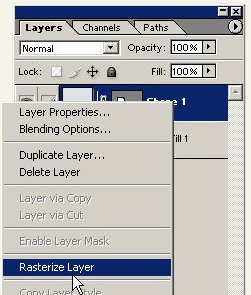
Go to the Layers Palette and Menu Box Right Click/Control Click on your layer and choose ‘Rasterize’.
Ctrl/Com mand+ R to get your Rulers visible on the document. Click and drag from the Rulers bar 2 horizontal and 2 vertical guides as i have done. Go to View and make sure ‘Snap’ is turn on. Then with the Rectangular Marquee Tool (M) drag a new selection as I have done.
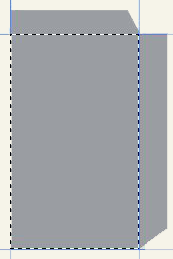
Then go ‘Select > Modify > Contract’ on the top menu bar and choose 2 pixels as I have done. Then hit the ‘Delete’ key on your keyboard to cut out the Marquee Selection area.

Now we’ll apply Styles formatting to the layer.
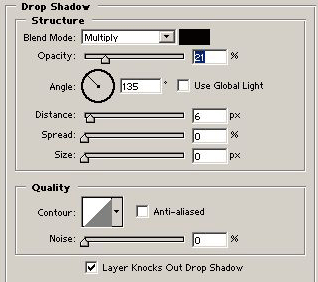
Right Click/Control Click on the layer and choose ‘Blending Options’ and start with the ‘Drop Shadow’ options that I have set up.
Right Click/Control Click on the layer and choose ‘Blending Options’ and start with the ‘Drop Shadow’ options that I have set up.
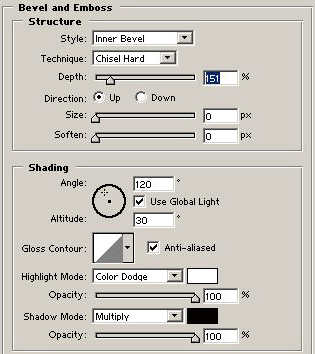
Then move down the same Blendings Options palette and choose ‘Bevel and Emboss’ and match my settings.
Then with the ‘Color Overlay’ options.

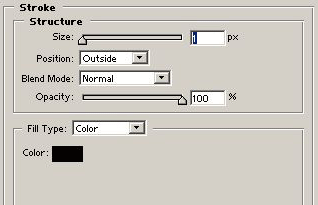
Then with the ‘Stroke’ options.
Presto! Pixel Border Menu Box. And a few enhancements could really make it look eye pleasing.
