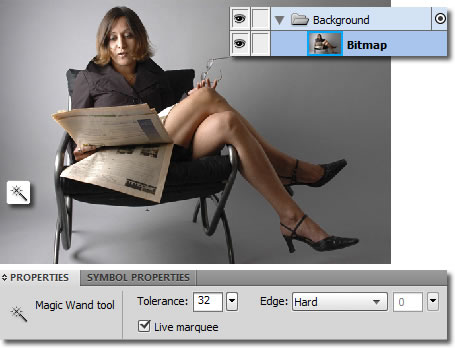
Below I have an image courtesy of AbsolutVision that I wish to knockout the background – in otherwords, isloate the subject from the surroundings.
To accomplish this is to utilize a Layer Mask.
Step One: Set Magic Want Options
With the ‘Bitmap’ object Layer selected, activate the Magic Wand Tool from the toolbar, then set it’s Property Inspector options as captured.
Step Two: Select Background
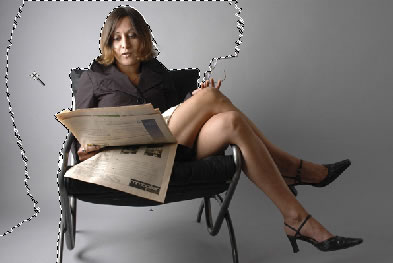
With the Magic Wand still active, click once to initiate a selection.
As captured below, my first click is to the the left. Notice how not all the background is not selected!
Tip: With the Live Marquee Property Inspector option selected, adjust the Tolerance integer value, slowly, to broaden your selection.
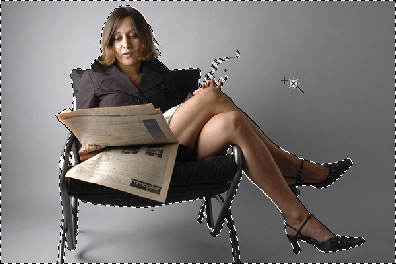
Then hold the SHIFT key (and click) remaining areas to complete te selection, as I have captured, below.
Pay attention to smaller areas in the image as well, example, the smaller areas surrounding the legs of the chair.
Tip: Shift key and Alt/Option keys act as moderator keys with an active selection. Shift to add to the selection, Alt/Option to minus from a selection.
Step Three: Inverse Selection and Add Layer Mask
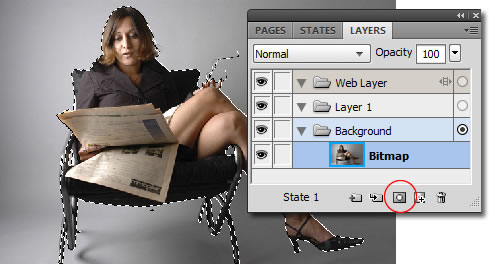
Once all areas is completly selected, go to the Select > Select Inverse menu command. This will set the selection focus on the model instead off the background.
Then click the Add Layer Mask icon command at the bottom of the Layers Panel (encircled in red), as captured below.
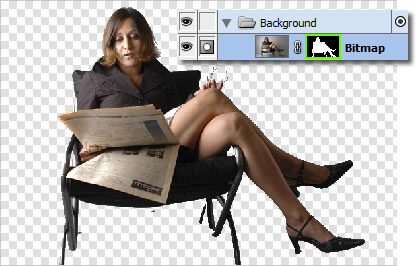
Here is finished Mask: a complete background knockout.
Notice the document view transparncy (checker board pattern) and the Mask thumbnail appended to the Bitmap Layer!
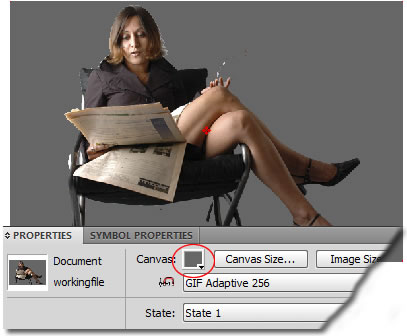
To compare the Mask against a different background, I added a new Canvas Solid Color Fill, as captured below.
What becomes evident is a ‘halo’ or fringe outline we have to deal with.
Step Four: Clean up Edges/’Halo’
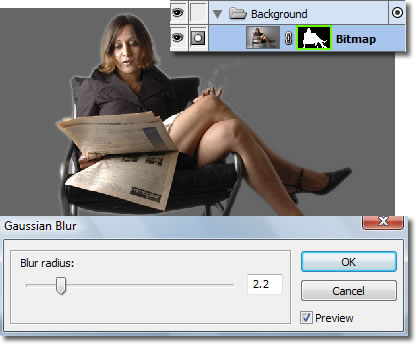
With the Layer Mask thumbnail active (indicated by the green outline), go to the Filters > Blur > Gaussian Blur menu command.
At the resulting dialog, enable Preview and adjust the slider to ‘soften’ the edge Mask. The value you use is discretionary based on your chosen image, I settled on 2.2 and then clicked OK to commit changes.
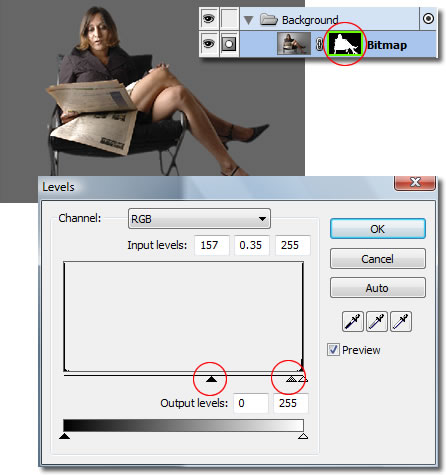
Finally, still with the Layer Mask thumbnail active/selected (encircled in red), go to the Filters > Adjust Colors > Levels menu command.
At the resulting dialog, push the Midtone (grey) and the Darkness (black) sliders to the right, similar to what I have captured below. Then click OK to commit changes.
Again, how far you push the sliders is discretionary.
Now notice how smooth and refined the Mask edges appear compared to the original Mask creation step.
