Ever want to create a Pattern in ImageReady & notice that it dosn’t quite follow through with the same easy process as Photoshop.
Well, this little tutorial will help solve that problem.
ImageReadys’ Define Pattern is a little quirky compared to Photoshop method. And even though it has a ‘Paint Bucket Tool’ where in Photoshop you would normally change the ‘Fill’ parameter from Foreground to Pattern, ImageReady does not.
The moment you ‘Edit/Define Pattern’ in ImageReady, it dosn’t prompt you with a dialog. It does however, capture it. Directly to the Clipboard.
To simulate this process do the following:
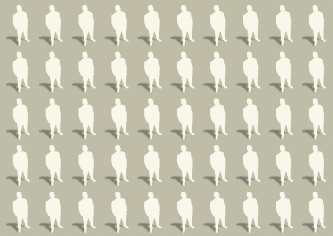
For the purpose of this tutorial I used the following image.

Select all (PC: Ctrl + A / Mac: Command + A) or use any of the Marquee Selection Tools and draw a selection on the image (or Layer that contains the pixel information).
Then go to the ‘Edit/Define Pattern’ menu command option, as captured below.
These two steps are exactly the same as in Photoshop except, at this point, you are not greeted with the ‘Pattern Name’ dialog.
So here is how to find that Pattern you just defined.
Start a new document in ImageReady (‘File/New’ document preset of your choice).
Create a new layer filled with any color. (Or double click the default locked ‘Background’ Layer to convert it to an edit able layer).
Note: The new layer cannot be transparent, thats why I sugest to fill it with any color
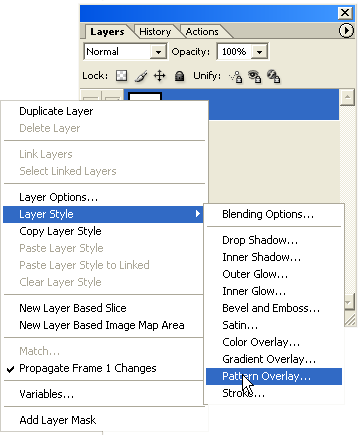
Right click, choose ‘Layer Style/Pattern Overlay’, as captured below.
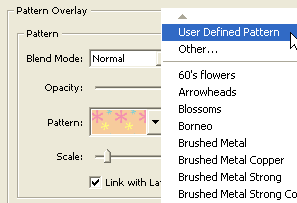
Click the Pattern Selector drop arrow and from the list choose the very top option ‘User Defined Pattern’, as captured below.
This will now update the Pattern Overlay panel (as encased in red below) as well as your document.
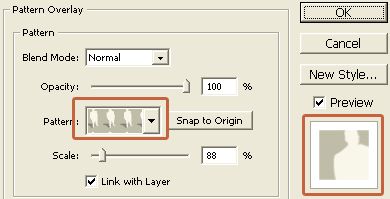
Note: Adjust the above ‘Scale’ and ‘Opacity’ sliders to your liking.
Here is what the Layers Palette show look like.
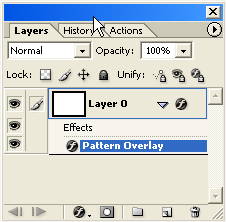
Here is portion of the patterned document.
Other Notes:
1.) The ‘User Defined Pattern’ only captured the last performed ‘Edit/Define Pattern’ command.
To add to the Pattern list:
a) Skip the ‘Define Pattern’ step altogether & save your image as a native .psd or .jpg file into your ‘PresetsPatternsAdobe ImageReady Only’ folder.
So, for example, I saved the following image as heathrowe.psd to a predefined location solely used for ImageReady Patterns.

That way instead of relying on the ‘User Defined Pattern’ (Temporary Clipboard option), select the ‘Other’ option from the Pattern Selector options. Then browse for that .psd or .jpg file, stored in your custom patterns folder.
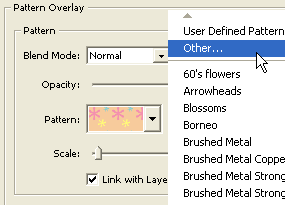
Or, simply save the same .psd file into the ‘[Drive Letter]:Program FilesAdobeAdobe Photoshop CSPresetsPatternsAdobe ImageReady Only’ folder, and it will appear in ImageReady’s predefined list, as I have captured below.
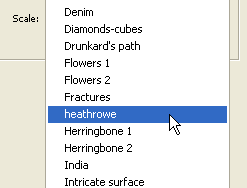
Note: If your saving the .psd file from ImageReady into the ‘…PatternsAdobe ImageReady Only’ folder, this will require an application restart in order for it to be visible.
b.) If your familiar with Illustrator, copy or recreate the desired Pattern into Illustrator then save as a .ai file into the ‘PresetsPatternsPostScript Patterns’ folder.
This will also be added to the predefined list.
