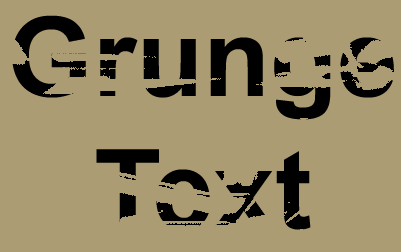
Here’s a handy trick to grunge artist enthusiast. This procedure will show you how to scratch the edge off text, while maintaining it’s edit ability.
Start off with a basic image size and add the text that I have captured below. Font color of White (#ffffff)

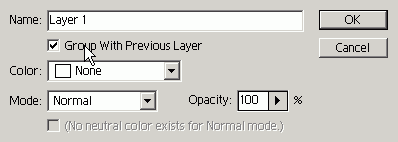
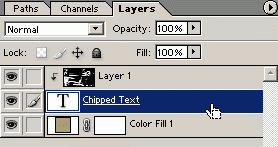
1. Then, create a new layer. (‘Shift+Ctrl+N’)

2. Then, on the add new property box, tick the ‘Group with Previous Layer’ option.
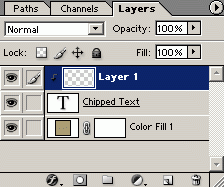
3. Your ‘Layers Palette’ should look like this.
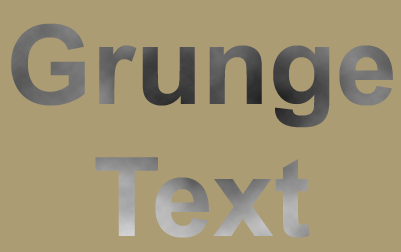
4. Next, set your Foreground/Background swatches to Black/White, then go ‘Filter/Render/Clouds’ on that same new grouped layer. (‘Layer 1’)

5. And this is how it should look at this point.
6. Still on Layer 1 group layer, go to ‘Image/Adjustments/Threshold’.
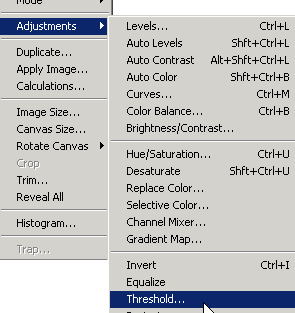
7. In the Threshold Control Panel, have ‘Preview’ ticked and adjust the slider.
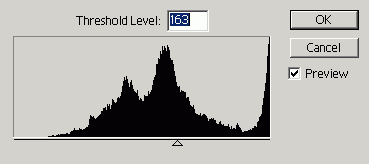
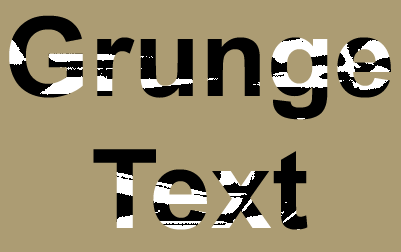
8. Here’s what I have so far. (Results may vary)
8. Next, select the original ‘Clipped Text’ Layer
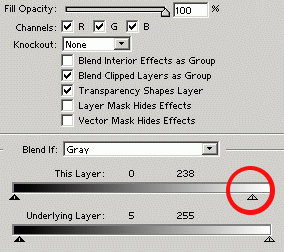
9. Right click, choose ‘Blending Options’, and from within the main control panel, adjust the ‘This Layer’ right slider under the white of the original text layer disappears.
10. Here’s the final result.