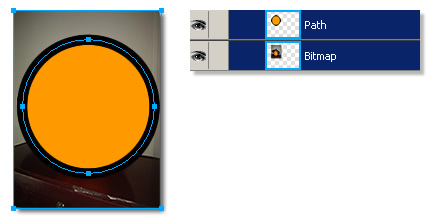
As captured below, the Layers Panel (and Canvas View) contain a Bitmap Image and a Vector Path (with Fill and Stroke) properties.
The objective is to mask the Bitmap to the shape of Vector Path.

To achieve the Vector Mask:
- Ensure the Path is above the Bitmap Layer in the Layers Panel.
- With the Pointer Tool (V) active, click and drag to position the Path ‘on top’ of the Bitmap, as captured below.
- Then select both the Path and the Bitmap Layers.
To multi-select: Hold Command/Ctrl key + Click the sub layers, or simply click the Layer Folder (my case ‘Background’) that contains them in the Layers Panel. Alternatively, Shift + Click directly onto the layer contents on the Canvas.
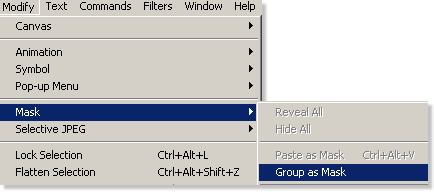
- Then go to the Modify > Mask > Group As Mask menu command.
Quite simple!
As captured below left, the Vector Mask is created but defaults to the Grayscale Appearance property in the Property Inspector.
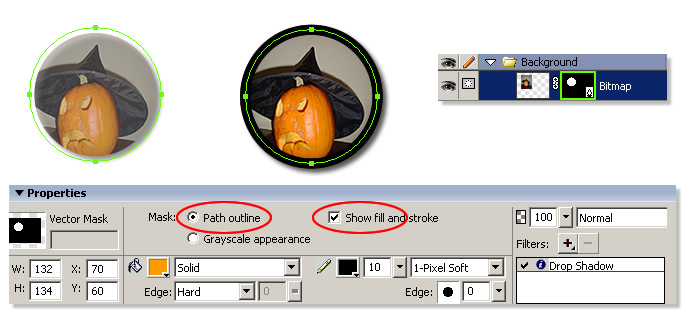
Optionally, change the Mask type to Path Outlines in the Property Inspector and enable Show Fill and Stroke to bring back the original Stroke.
Tips:
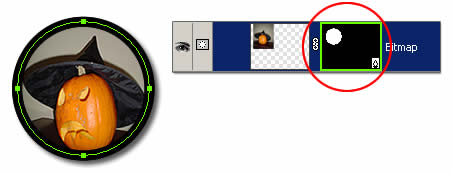
You know you created a Vector Mask based on the Mask thumbnail icon (encircled in red) in the Layers Panel. (Also the Property Inspector title dictates ‘Vector Mask’ when it is active.)
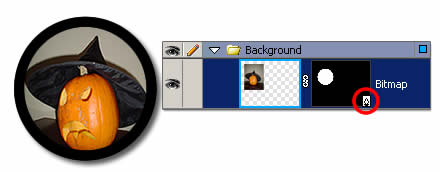
To activate just the Vector Mask and to access it’s Property Inspector options, simply click directly onto the Mask thumbnail and it’s contents will highlight with a green border, as captured/encircled in red below.
To adjust the Grayscale Appearance (if this is your choosen option) then click the Solid Fill color picker (encircled in red), then to Reveal All choose pure white (encircled in green), to Hide All choose pure black (encircled in blue) or any shade of gray in between for variations in opacity.

