1. Select the Shape Tool option (Press the letter U on the keyboard). Hold the mouse click and the drop down option reveals six different Shape options.
![]()
2. Once you have selected a basic Shape tool, at the very top of Photoshop’s menu area, a new ‘Options Bar’ appears.(As I have captured to the right)
But i will only focus on the area I have in Red Outline.

3. These five (5) options allow you to create Single or Multiple shapes on the same layer.
With a few other added features I will explore.
Helpful Tips: Easy Selections
*Hold the Control Key and Click the Rectangle Shape to auto select.
*  Use the ‘Direct Selection Tool (A)’ to select it.
*Or turn on Photoshop’s ‘Auto Select’ Feature.

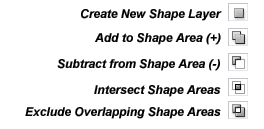
4. ‘Create a New Shape Area’ 
Select the ‘Create a New Shape Are’ from the Options bar as I have shown.
Click & Drag on your document to draw out your shape.
This one is too easy, I know.

5. ‘Add to Shape Area (+)'(Shift Key & Drag) 
As from the previous example click and draw any of the Shape Tools (I’ve used the Rectangle Shape Tool) onto your document, then select the ‘Add to Shape Area’ option and continue to add new shapes.
The advantage here is that no matter how many shapes you draw, they all appear on only a single layer.
I’ll reveal more advantages latter on…
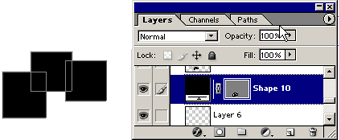
6. ‘Subtract from Shape Area (-)’ (Alt Key & Drag) 
As from the previous example click and draw any of the Shape Tools onto your document, then select the ‘Subtract from Shape Area (-)’ option.
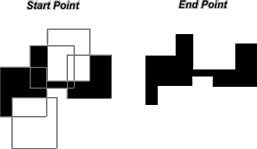
7. ‘Intersect Shape Areas’ 
As from the previous example click and draw any of the Shape Tools onto your document, then select the ‘Intersect Shape Areas’ option.
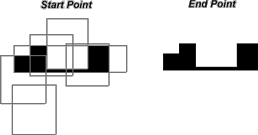
8. ‘Exclude Overlapping Shape Areas’ 
As from the previous example click and draw any of the Shape Tools onto your document, then select the ‘Exclude Overlapping Shape Areas’ option.
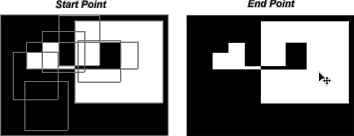
8. Now, getting back to those other advantages…
You may have noticed something about my captured samples above, particularly, the ‘Starting Point’ images, or if you tried them yourself, you’ve probably figured it out…
That is, each new Shape added to the layer has its own bounding box(edit able outlines)and they can be manipulated individually.
If at any time you’ve strayed away from the use of the Create New Shape options, just use the ‘Direct Selection Tool’ to select all or any of the Multiple parts.

9. The individual additional shapes can be repositioned elsewhere on the document.
Great if your a perfectionist.

10. The individual additional shapes can be edited to create complex shapes.
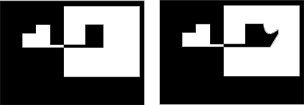
As to the right, I started the edit by choosing the ‘Convert Anchor Point’ tool (found under the ‘Pen Tool’ fly out menu.
Then, click and drag on any of the bounding Anchor Points.(Black Dots) 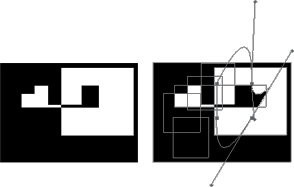
11. With that little edit, I got a Smooth curve on the Shape.
