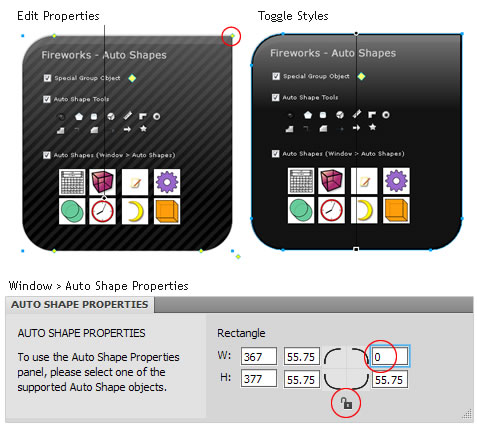
Here lies the delimma.
You create a graphic element using an Auto Shape (Rounded Rectangle, for example) and discover that attempting to apply a Style (Window > Style) just does not work.
This is as designed given the fact that the core nature of an Auto Shape is based on mere javascript. On canvas it is presented as a special group object and we are able to interact with it by using the yellow group node handlers.
Note: Additional properties per Auto Shape Tool are also available in the Window > Auto Shape Properties Panel.
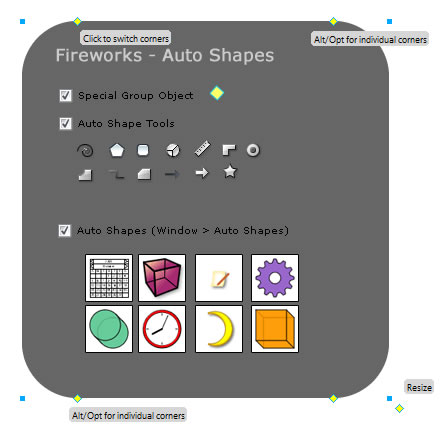
Yet, any attempt to apply, a style from the Styles Panel (Dark Chrome, for example) nothing happens.
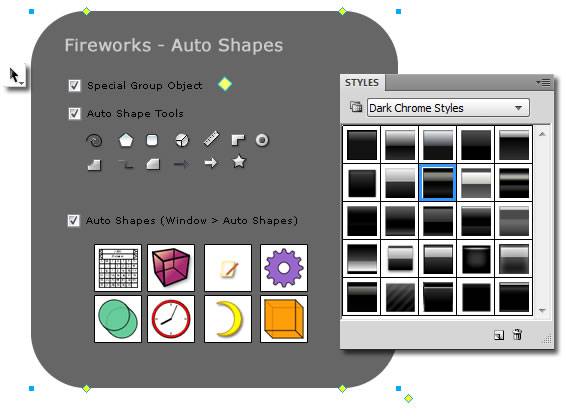
You have three options.
Option 1: Ungroup
Ungroup the active Auto Shape using Modify > Ungroup (Right Click/Control > Ungroup) to revert it to a Path object, then apply any Style.
However, in this case you lose the benefits of using an Auto Shape’s node handler properties and from the Window > Auto Shape Properties panel.
See the next two options to avoid ungrouping an Auto Shape, in this regard.
Option 2: Subselect, Superselect
Reap the benefits of both Auto Shape Properties and apply Styles using a few keyboard shortcuts:
- With the Auto Shape active
- SubSelect the Auto Shape Path object using Ctrl/Command + Left Arrow Key
- Then apply your choice of style from the Styles Panel
- SuperSelect the original Auto Shape object using Ctrl/Command + Right Arrow Key
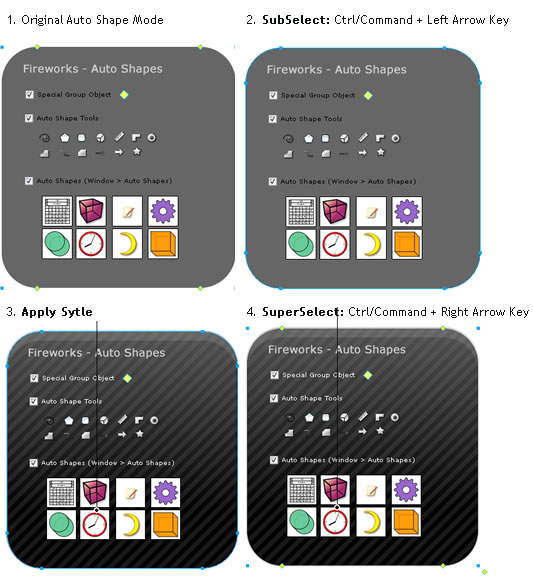
Note: Subselect and Superselect are also located under the Select menu.
Option 3: Pointer, Subselection
Reap the benefits of both Auto Shape Properties and apply Styles by toggling between the Pointer Tool and Subselection Tool from the toolbar:
- Pointer Tool selects the original Auto Shape
- Subselection Tool selects the Auto Shapes path nodes
- Then apply your choice of style from the Styles Panel
- Then revert back to the Pointer Tool to toggle back to the original Auto Shape
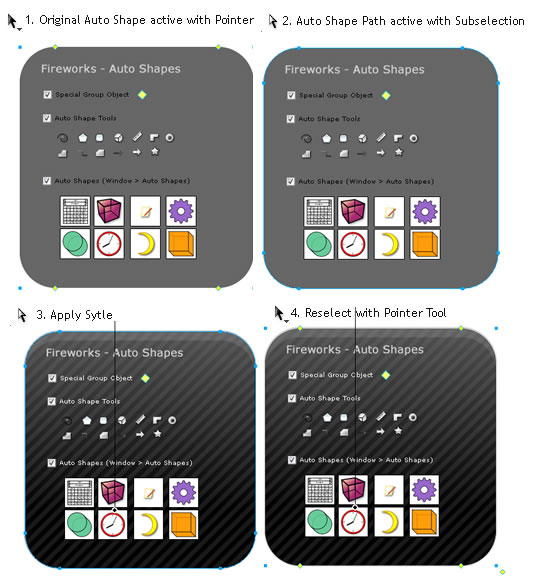
So, maintain integrity of your Auto Shape Properties with applied Styles using either Option 2 or 3.
