[message type=”info”]SAMPLE PREVIEW AND DOWNLOAD NOW UPDATED FOR THE LATEST VERSION OF EDGE ANIMATE[/message]
Here is a simple example demonstration symbol creation and using multiple instances’ of that symbol on the Timeline, with a touch of Playback dynamics and CSS (‘box-shadow’) ‘blur’ effect.
Click the image below (or Symbol Instance Animation) to preview the animation.
One: New Edge Project
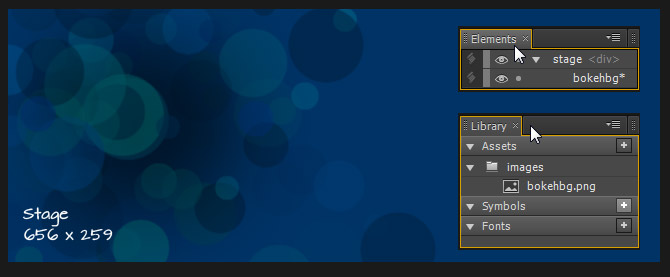
Create a new Project (File > New) using a Stage size of your choice. Then File > Import (or drag n’ drop from your machine to Stage) a graphic file as backfrop for the animation.
Two: Create Element
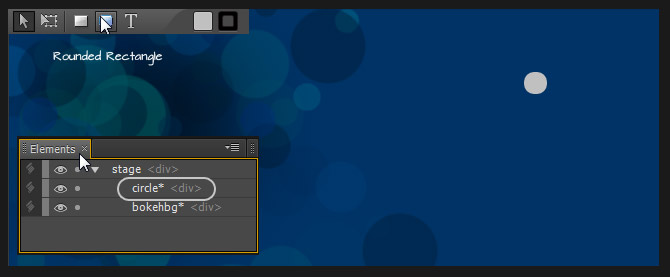
Select the Rounded Rectangle To0l and draw a small circle element (Color #c0c0c0) on the Stage (rename the element to ‘circle’, or something user-friendly, other than the default ‘RoundRect#’).
Three: Convert Element to Symbol
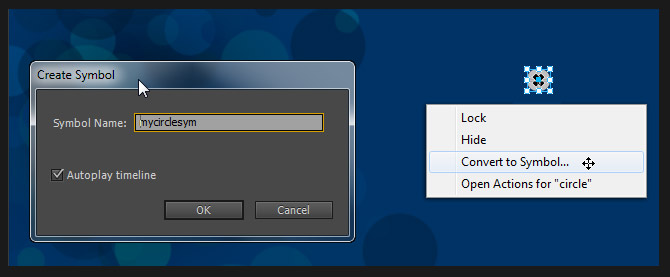
Select the ‘circle’ element, then Right/Option Click and from the context menu list choose Convert To Symbol. At the Create Symbol prompt give it a user-friendly name then Ok to commit.
Four: Create Symbol Animation
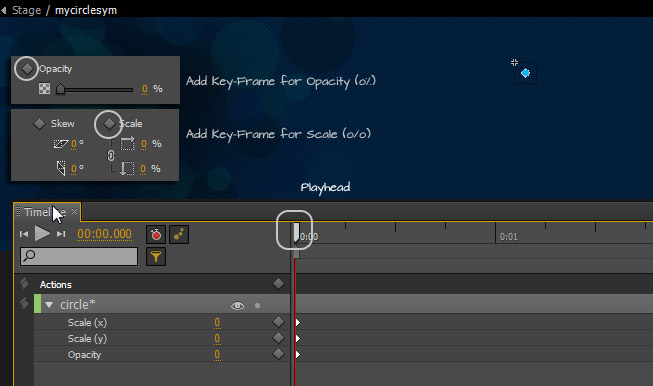
Double Click directly onto the ‘mycirclesym’ symbol instance to enter Edit in Place’ mode. Once in ‘Edit in Place’, with the ‘Playhead’ at 0; in the Properties Panel, click the ‘Add KeyFrame for Opacity’ and change the default value of 100% down to 0%. Then click the ‘Add Keyframe for Scale X & Y’ and change its default scale factor of 100% down to 0%.
The Basic Animation
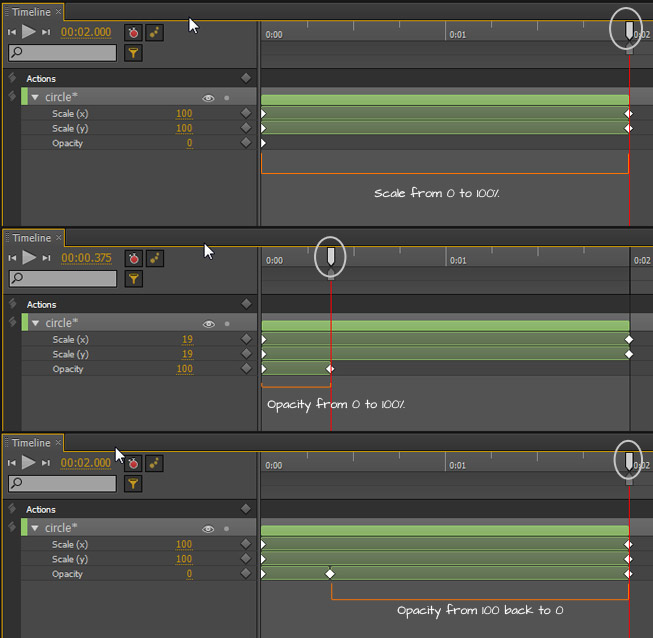
The below capture simply demonstrates, that from o secs to 2 secs both, Opacity and Scale start at o%; the Scale factor change will occupy the full 2 second length, while the Opacity change will fade in briefly then fadeout for the remaining duration.
- drag the Playhead to 2 seconds, add a Keyframe for the Scale property and adjust it’s property to 100%;
- drag the Playhead to .375 seconds, add a Keyframe for Opacity and adjust it back to 100%;
- drag the Playhead back to 2 seconds, add another Keyframe for the Opacity property back down to 0%;
Loop Animation
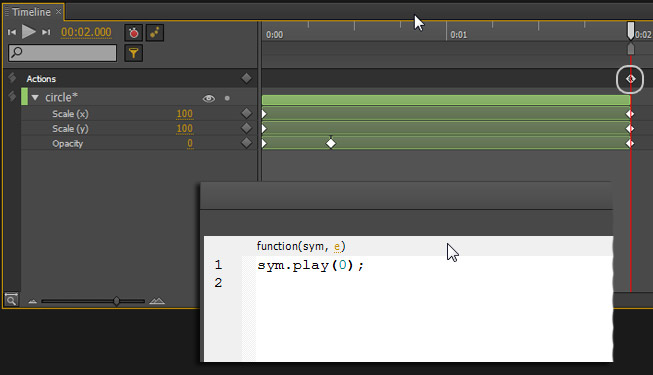
At this stage if you preview in your browser all you will get is a single ‘play’ instance of the animation, so let’s add a little Action Trigger to loop back to the start, for continious playback.
Still in Symbol Edit Mode: Position the Playhead at the end (2 seconds in our case); go to the Timeline > Add Trigger menu command; at the code editor panel enter sym.play(0); then click anywhere outside the code panel to close and commit trigger addition. As captured below you should now have an ‘a’ action trigger marker located at 2 seconds.
Add Blur
Before delving into creating symbol instance, let’s apply a simple Blur effect using the css3 ‘box-shadow’ property on the ‘circle’ element.
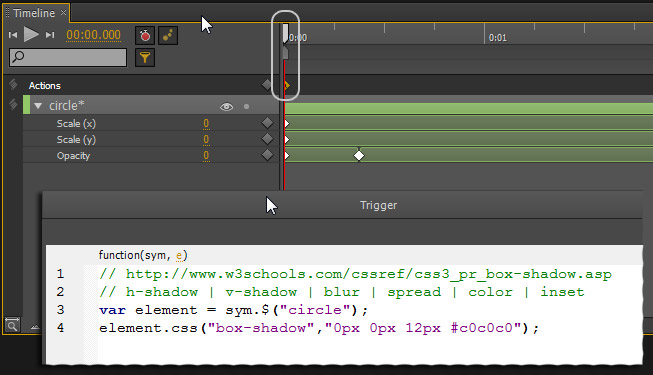
Still in Symbol Edit Mode: Position the Playhead at 0 seconds; go back to the Timeline > Add Trigger menu command and copy/paste the following code snippet into the code editor panel. (Be sure to visit the w3schools reference link to experiement with the different box-shadow properties.)
// http://www.w3schools.com/cssref/css3_pr_box-shadow.asp
// h-shadow | v-shadow | blur | spread | color | inset
var element = sym.$("circle");
element.css("box-shadow","0px 0px 12px #c0c0c0");
Once pasted, click outside the editor panel to close and commit changes. As captured below, you should now have an ‘a’ Action Trigger positioned at 0 seconds on the Timeline.
We can now exit Edit in Place Mode (click the Stage) breadcrumb link at the top of the Edit in Place Window.
File > Preview in Browser and you should have a simple loop of the circle fading into full-scale, with a slight blur around the edge.
Five: Create Symbol Instance
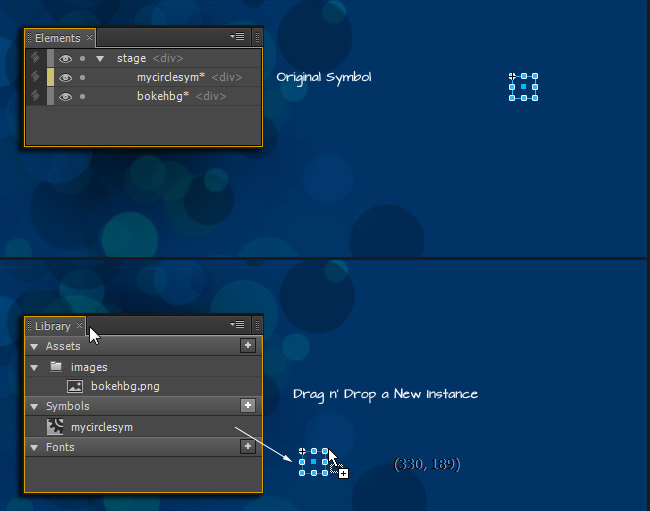
Now lets get creative with the original symbol. Drag and drop the original symbol ‘mycirclesym’ anywhere onto the Stage to create a Symbol Instance.
If you ‘File > Preview in Browser’ now, you should have two identical circles fade in and out, continuously, at the position where they are located on the Stage.
However, I want to apply some dynamics to any new instance added to the Stage. In our case I want to control ‘when’ on the Stage Timeline the instance should play; and apply a new Scale factor for each instance.
Symbol Playback Control
To control the Symbol Playback:
- Position the Playhead at 0;
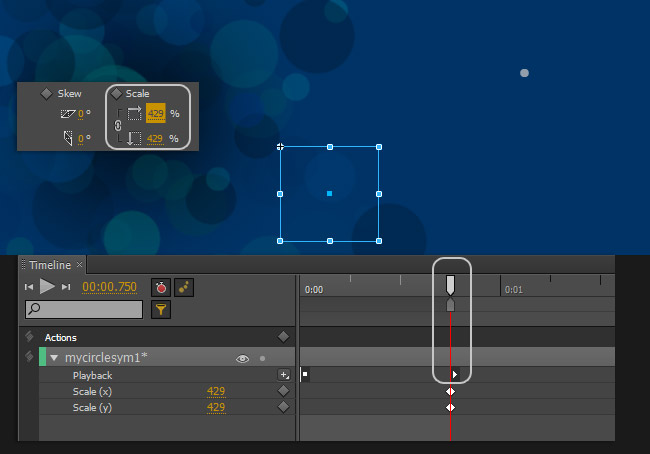
- Select the Symbol Instance then in the Properties Panel > Playhead Actions choose Stop; A ‘Stop’ icon will be appended at the position of the Playhead.
- Adjust the Playhead to a new position on the Timeline then go back to the Playback Options > Play; A ‘Play’ icon will be appended at the position of the Playhead.
If you ‘File > Preview in Browser’ you should have the original symbol immediately start; followed by the symbol instance at the time dictated by the Playback Control (in my case it plays at .750).
Adjust Symbol Instance Scale Factor
At the exact same Timeline location the Playback (Play) is invoked, add a Keyframe for Scale X & Y with an increase in value from the original.
If you ‘File > Preview in Browser’ you should have the original symbol immediately start; followed by the symbol instance at the time dictated by the Playback Control with a new Scale factor applied.
Six: Add Additional Instance
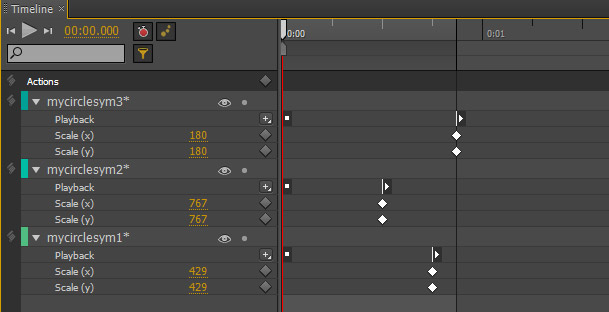
Repeat step 5 (Drag/Drop original instance onto Stage; add ‘stop’ Playback at 0; add ‘play’ Playback at a new position on the Timeline; adjust ‘scale’ factor) for each additional symbol instance.
As captured below, I created two additional instance of the original symbol ‘playing’ at different Timeline locations; with varying ‘scale’ factors.
Preview Symbol Instance Animation result.
Download original source project file, below.
A demonstration of a ‘blur’ Bokeh effect and symbol instance in Edge Animate.


