Adobe Edge Animate 1.0 Overview
It’s been seven glorious public previews over the past year or so and Adobe Edge Animate has reached version 1 status.
The following overview is certainly not complete, so be sure to check out the following official Edge Animate related resource links.
- Download Adobe Edge Animate from the Adobe Creative Cloud
- Official Feature Highlights
- View additional Adobe Edge Tools & Services
- Adobe Edge Animate Help
- Adobe Edge Animate JavaScript API
- Adobe Edge Animate Community
Welcome Screen
From the welcome screen we have instant access to:
- project commands: Open File for previously saved projects or Create New to start a new project;
- recently saved project files from the Recent Files list;
- resource tab options with In-App Lessons (Getting Started), notable core features (Key Features), and resource references (Resources);
- social media connection through Facebook and/or Twitter;
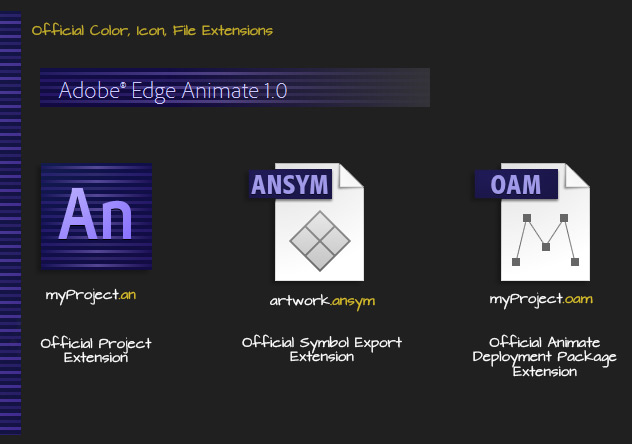
Official Branding Color, Icon and File Extension(s)
The official branding and color scheme is now graced with a purple overtone.
The file extensions are also finalized as followed:
- Project files now have the extension of .an;
- Symbol export files is now .ansym;
- Animate Deployment Package files (via File > Publish Settings) is .oam;
Edge Animate: Toolset & Workspace Overview
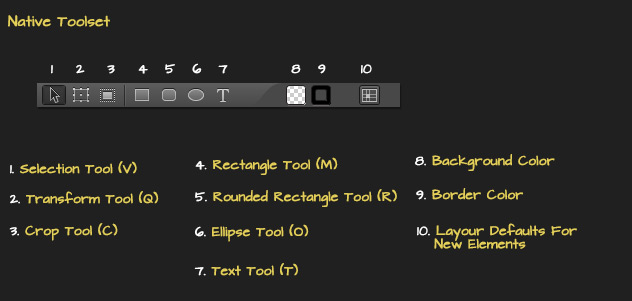
Adobe Edge Animate strength is it’s ability to create engaging experiences through precise authoring tools and a representation on a visual timeline. Interact with elements (1-3) or create elements using the native toolset (4-7) and the end user need to worry about the fine details of HTML5 or CSS.
The following capture shows the general gist of the Edge Animate workspace: use the Toolbar tools to interact with Stage Elements, and create transitions by tracking element Property value changes over time (captured via Keyframes) in the Timeline. Additional image or .svg assets can be imported (File > Import), web font libraries or symbol instances can be housed in the Library Panel.
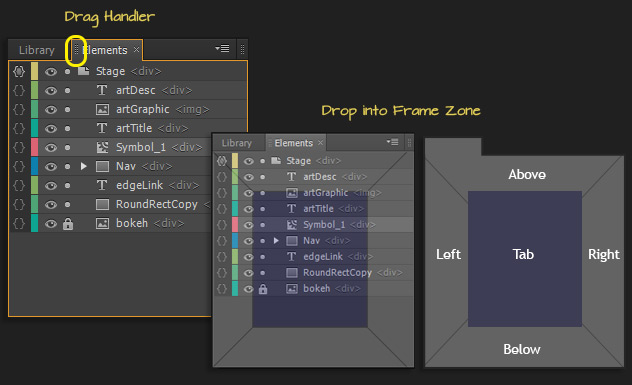
To adjust the workspace panel positions click and drag the active Panel handler icon to the left of the Panel title (or the entire tab itself); then drop it into one of the Panel ‘Frame’ zones on the target panel. I have them labeled as Above, Below, Left, Right and Tab. The target panel zone will highlight a shade of purple and at that point you can release the mouse to commit the reposition.
When you have the Panels repositioned to your liking go to the Window > New Workspace menu command to save it as a custom workspace.
Edge Animate: Localization
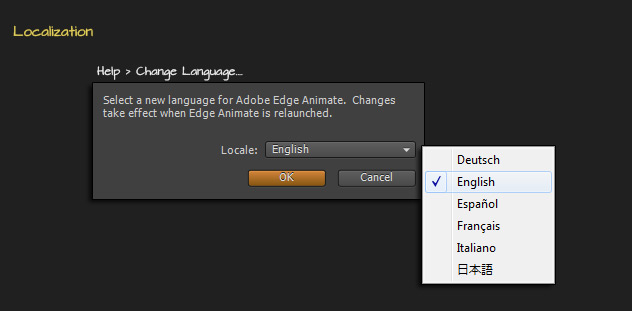
In addition to English, Edge is now available in German, Spanish, French, Italian, and Japanese. To switch the language, select the ‘Help > Change Language’ menu command.
Edge Animate: Publish to Web, Deployment Package and Adobe DPS iBooks
Adobe Edge Animate offers three publishing options via the File > Publishing menu command.
- Publish to Web: Render final project for the web at the designated target directory and upload (ftp) to your web host to view.Additional web publish options allows you to target older versions of Internet Explorer by enabling the ‘google chrome frame’. Streamline the loading of frameworks by via CDN. Publish content as static HTML and HTML tags instead of injection via JavaScript improving SEO and compatibility for Screen Readers
- Publish as Deployment Package: for use in other Adobe applications such as Adobe Indesign
- Publish to Apple iBooks Author
Edge Animate: Stage
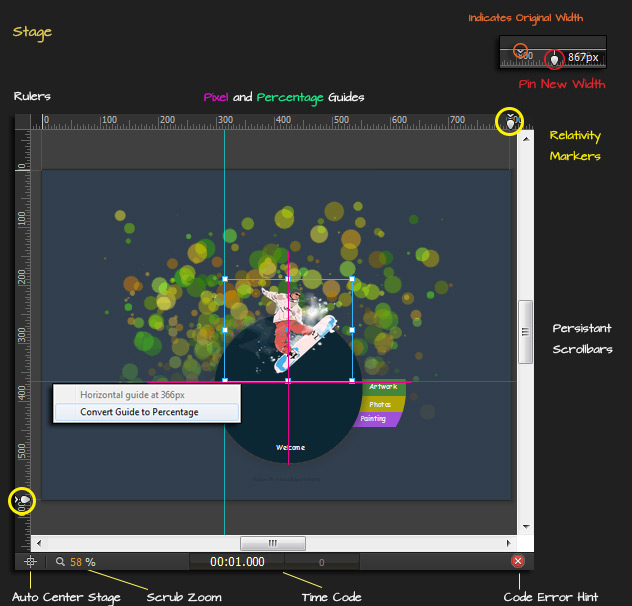
- Access Stage Rulers (Ctrl/Command + R or View > Rulers menu command to toggle) and define Pixel or Percentage Guides;
- Persistent Stage Scrollbars and an Auto Center Stage target icon command;
- Scrub Zoom – simply scrub/drag left for zoom control. Double-click the value to manually enter a percentage into the field.
- Relativity Marker/Pin(s) – when the Stage percentage property is used you get an adjustable ‘pin’ to preview on-stage how the design will reposition based on the value set.
- Quickly troubleshoot event handler code or generic script errors with Code Error Hints to the lower right of the stage.
Edge Animate: Property Panel
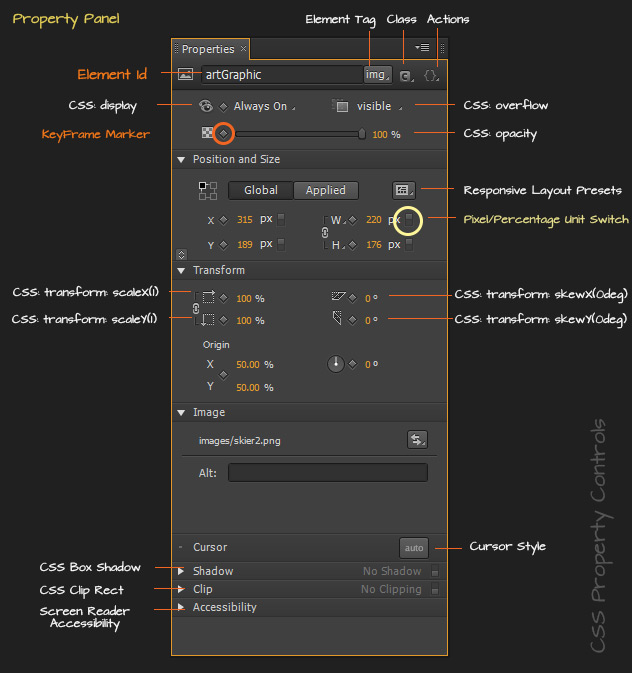
Adobe Edge Animates’ strength is how it captures an assigned (id) element tag and its (css) property changes ‘pinned’ as keyframes on the timeline. The change in property values between those keyframes then translates into a transition or a rendered animation.
The following capture outlines some of the Property Panel context element controls. In my use case the element is an ‘img’ and displays context sensitive properties not available to other elements.
Edge Animate: Elements Panel
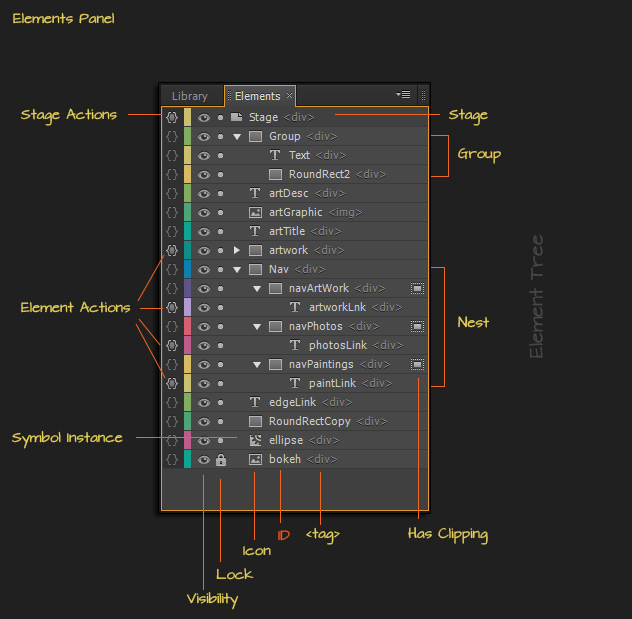
Adobe Edge Animate Elements Panel shows a node tree structure or representation as they appear relative to the parent symbol ‘Stage’. Elements stacked or positioned to the top have a higher z-index (stack) order and appear in front of elements with a lower stack order.
The following capture dictates the majority of the Elements Panel functionality, iconography and use case scenarios.
- All Elements are assigned a user-defined Id and Tag and is represented with an associated element type icon;
- Then stack (position) elements using Adobe Edge Animate Group, Nesting, or Symbol Instance functionality.
- Assign global Stage Actions (compositionReady, scroll, orientationchange, resize .etc) or local Element Actions (click, mouseover, touchstart .etc) by clicking the associated actions icon and choose from the event handler list.
- Double-click a Symbol Instance icon to enter Symbol Edit in Place Mode.
- Toggle ‘visibility’ is for preview mode only, and is not apply at runtime.
- Right Click/Option Click on any Element for further context sensitive commands or go to the Modify menu command for additional commands on an active element.
Edge Animate: Timeline
Adobe Edge Animate Timeline combines the element node tree structure and associated keyframe property on the left with a time-scale infographic on the right. Element property values (keyframes) are pinned at a specific times and a transition is created when that value is changed.
Also demonstrated below:
- Custom timeline ‘Label’ and ‘Trigger’ can also dictate event conditions and handlers; Ctrl/Command + L to place a ‘Label’ at the position of the playhead. Ctrl/Command +T to place a ‘Trigger’ at the position of the playhead.
- Filter Animated Elements to isolate only those elements that have transitions applied;
- Enable Timeline Snapping, Grid and associated Grid Size for user-defined control;
- Right Click/ Control Click anywhere on the Timeline or directly on a color-coded transition bar for additional context sensitive commands (also available from the Timeline menu command).
Edge Animate: Mobile-ready Content with Responsive Layouts, Restraints & Presets
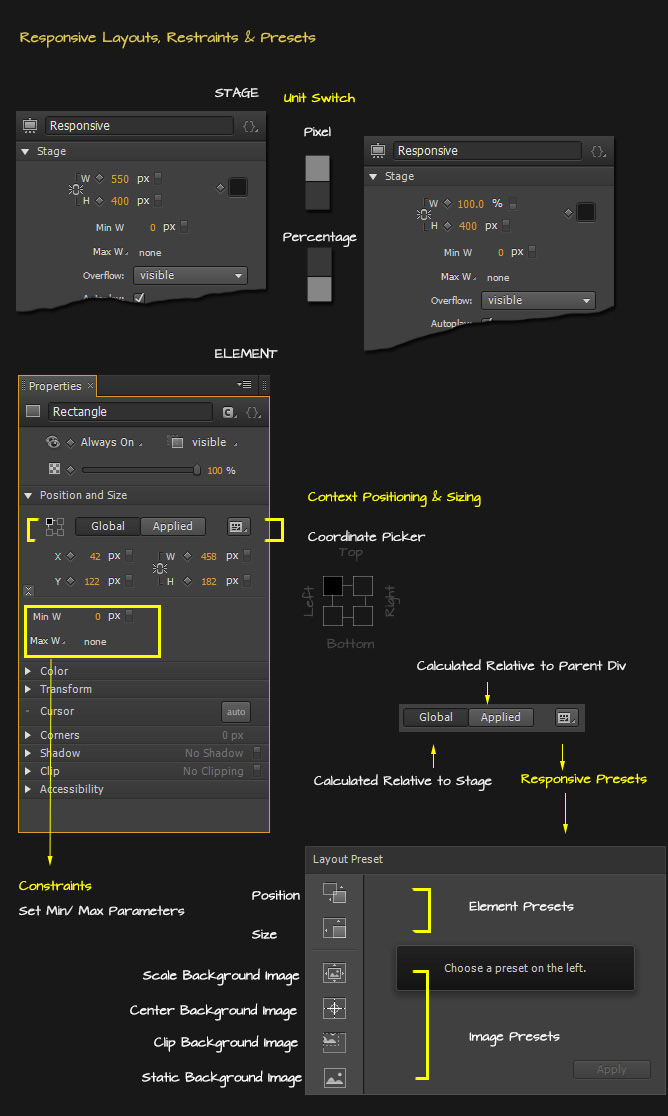
For a complete overview and example use case go through the ‘Resize’ In-App Lesson on the main splash-screen.
- Combine Stage level Percentages (optional Constraints) with a mixture of Context Position and Size properties (optional Constraints) to achieve responsive Layouts.
- Resort to Layout Defaults for new Elements and Imported Graphics or select from a Layout Preset for an active element or image.
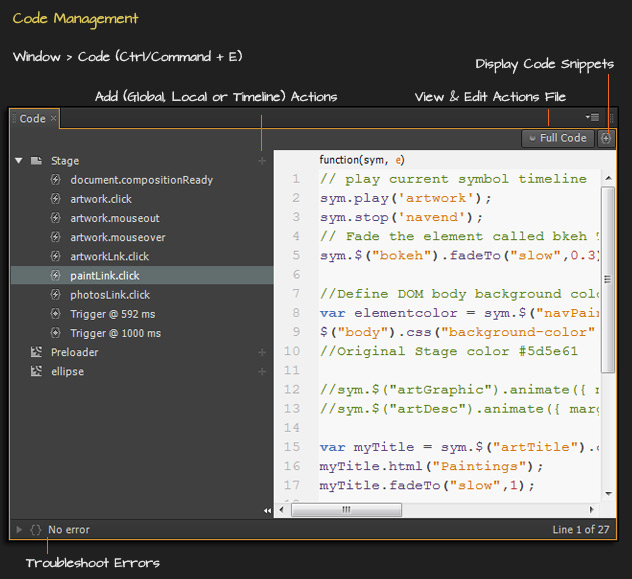
Edge Animate: Code Management
Access a more complete view of all the actions and Timeline triggers in a single Code window. Simply go to the Window > Code (Ctrl/Command + E) menu command. Then highlight the action or trigger to the left to view or edit.
- Click the + icon to add global, local or timeline actions or triggers;
- Click the Full Code button command to view and edit all actions in a single file;
- Troubleshoot errors in code with in-panel code error hints;
- Download Adobe Edge Animate from the Adobe Creative Cloud
- Official Feature Highlights
- View additional Adobe Edge Tools & Services
- Adobe Edge Animate Help
- Adobe Edge Animate JavaScript API
- Adobe Edge Animate Community

