Here’s a few simple steps to simulate ocean or water texture using Photoshop CS ‘Fibers’ filter combined with the ‘Liquify Filter’ and various Blend Mode and Adjustment Layers.
-
First, start a new document, I used an equal size preset of 450×450.
-
Create a new empty Layer (Shift + Ctrl + N (Mac: Shift + Command + N), just above the default document background Layer.
Next, set the Foreground Color to a variant of blue (I used #4372AA) and set the Background Color to Black #000000.
Next, go to ‘Filter/Render/Clouds’ to that your first effect is similar to what I have captured below.

-
Next, go to ‘Filter/Render/Fibers’ and select a setting that your comfortable with, so that you can see (though in vertical direction) varying crests of waves within the render.
My settings are captured below – Adjust the ‘Fibers’ Variance’ level is up to you.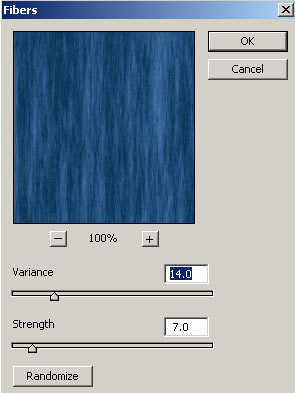
-
Next, we need to revert the direction of the water to a horizontal position. So, simply, go to ‘Image/Rotate Canvas. 90 CW’ to position the image as I have captured below.
(This is why I used an equal size preset so that there would be no further resizing or positioning!)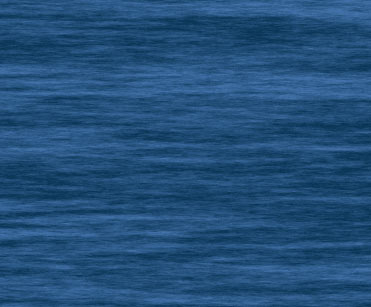
Looking good so far!
From here it’s simply a matter of adjusting varying color. Though, there are many ways to achieve this, I will simply apply a Blending Mode to a duplicate Layer.
-
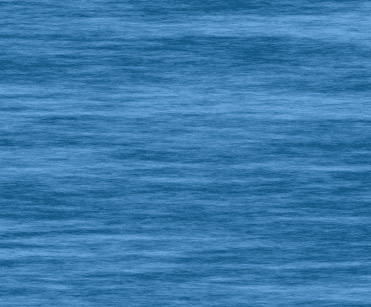
So, duplicate the water Layer, and change the ‘Blending Mode’ to ‘Screen’, and bump down the ‘Opacity’ level to one that you are comfortable with.
And here is the improved water texture.
-
Next, we’ll apply a separate ‘Gradient Fill’ Layer of color #CBDEFB, to simulate a shallow foreground water level.
To do this, simply set the ‘Foreground Color’ to the above blue color (#CBDEFB), then select the ‘New Fill or Adjustment Layer’ icon
 located at the bottom of the Layers Palette. Then from the list choose, ‘Gradient…’.
 The ‘Gradient Fill’ dialog box will prompt you with the below settings.
Notice, the Foreground Color we set above is applied to the settings. Also, it should be ‘Foreground to Transparent’. Click OK.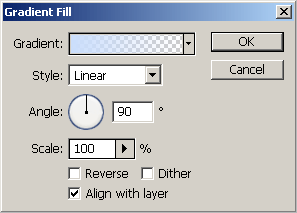
Note: I bumped down the Opacity Level of this ‘Gradient Fill Layer’ to allow the shallow affect to appear gradual.
Here is how the image looks.

-
Next, select ‘Layer 1 copy’ in the Layers Palette to make it the current edit able Layer, and go ‘Filter/Liquify’ (Shift Ctrl + X (Mac: Shift + Command + X)) to open the ‘Liquify’ Filter control panel.
From within this panel, we’ll apply the ‘Turbulence Tool (T)’ and as demonstrated in the below Linked Screen shot, with the applied Brush Tool Options (right), and with the ‘Turbulence Tool (T)’ selected, simply click and drag at various areas in either a straight path or semi-circular motion to smooth out some of the waves.
Click here for ‘Liquify Filter’ Screen. (137 kb)
When satisfied with the smoothing, click OK, to commit the Liquify process. Though, your results will vary from mine, the idea is to tone down or smooth the texture of the waves.
Note: Remember that this Layers Blending Mode is set to Screen, so any exaggeration with the liquify will appear subtle. (Pending this Layers Opacity Level setting)Here is my result.

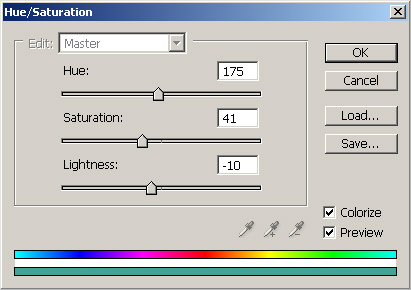
Then adjust the ‘Master’ color mode, with ‘Colorize’ (lowered left) activated until your content with the new color adjustment.
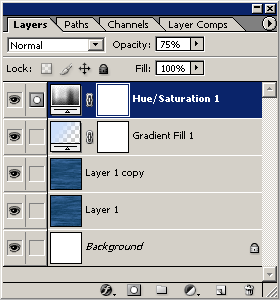
Here is the Layers Palette thus far. I also bumped down the Opacity Level of this Layer to give me a desirable color blending.
