Transparencies to Indexed images
Here’s a powerful trick to quickly add transparency to an indexed composite using features in the ‘Save for Web’ Control Panel.
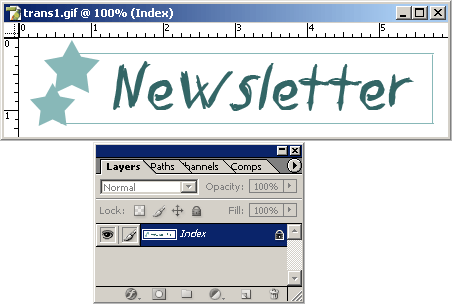
Below is a simple index (.gif) image I loaded into Photoshop. Instantly, you should notice that the image is locked. To provide a quick method to apply a transparency without the use of the complex methods.
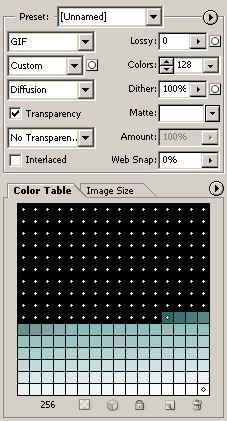
- ‘File > Save for Web’ menu command.The first thing you should notice, is in the ‘Color Table’, and the choice of ‘Color Reduction Algorithm’ method used – this case it automatically loaded as ‘Custom’.
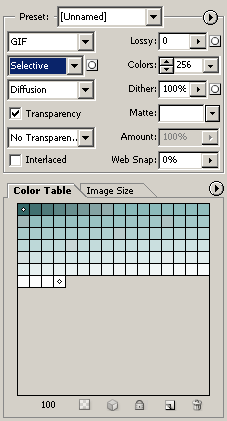
- Let’s switch this algorithm method to ‘Selective’, and this will automatically remove the redundant color pixels from the image. (As indicated in the Color Table)
 Also, let’s focus on the Tools on the left of the ‘Save For Web’ Control Panel, (particularly the ‘Eyedropper Tool (I)’) and the tools to the bottom of the ‘Color Table’. (particularly the Map Select Color/Lock Selected Colors)
(Encased in red in the below link)Full Screen Shot of the ‘Save for Web’ control panel.
- Select the ‘Eyedropper Tool (I)’ and click on a color (the ‘star’ shape for example) to load it into the Eyedropper Color Swatch just below it.
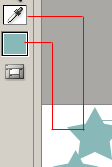 Doing this will select that particular color in the ‘Color Table’ (as indicated by the white outline). To protect this color from being dropped in the final process, hit the ‘Lock’ icon, as I have indicated below.
Repeat this process for any other colors you want to protect.
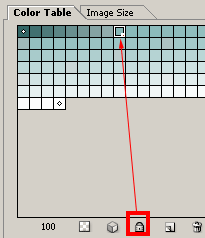
- For the final step, select the white background with the ‘Eyedropper Tool (I)’, (this is the color we want to knockout) and on the bottom of the ‘Color Table’, select the ‘Map Selected Color to Transparent’ icon.
See below link for details.Full Screen Shot of the ‘Save for Web’ control panel.
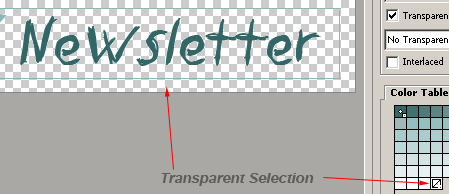
Wallah! The ‘Color Table’, now indicates that previous color(white) is now Transparent, as is also visible in the Optimized Preview window.
Now ‘Save’ your image.
Notes:
- Since theres no Undo key shortcut available here, go to the ‘Optimize Menu’ and choose the appropriate action without closing the control panel.
- If you decide to choose the ‘Edit in ImageReady’ option button from here at the bottom of the Optimize window, you will get the following error message.
To avoid this, make sure you convert the ‘Index’ mode image to ‘RGB’ mode via the ‘Image/Mode’ menu command option. - If you do continue to ‘Edit in ImageReady’, and you still see the white background. Don’t Panic! Switch to the ‘Optimized Tab’ and you will see the transparency also.
- If you totally mess up and you can’t find your way back, without having to close the ‘Save for Web ‘ panel, then simply hold down the ‘Alt’ key and the ‘Cancel’ button will revert to a ‘Reset’ button.
- To avoid white halo’s around your image, be sure to set the ‘Matte Color’ to ‘None or to ‘Other’ that matches the background of the web page this image will be placed on.

