Below are the two images in question.
The (A) image is the one with the preferred color cast, and will be used in the ‘Match Color’ process for the (B) image.


To correct this, have both images open in Photoshop CS2.
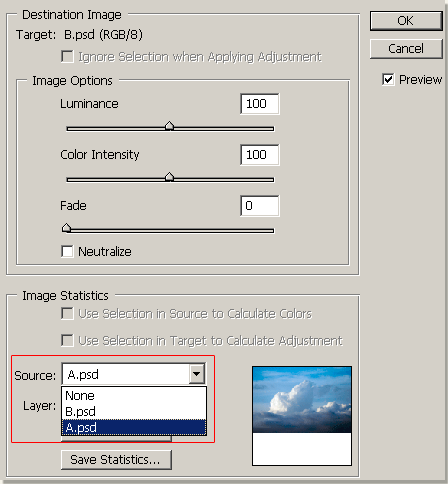
Have the target image (B) active then go ‘Image/Adjustments/Match Color’ menu command.
Then select the Source image (A) from the ‘Source’ drop down list to instantly Match Colors.

If the color cast does not match your preference adjust:
- the ‘Luminance’ slider to control the amount of light,
- adjust the ‘Color Intensity’ slider to boost or lower saturation
- and or adjust the ‘Fade’ slider to control the amount of the above items to the overall result.
- Select any custom shape from the preset picker.
Here is the resulting Match Color Effect.


Thats fine and dandy, but theres a little more control here than meets the eye.
Refine the Match Color to a specified selection. Example match color from a limited area (selection) from A. to the entire image of B.


To do this, simply refine a selection to the source image (A) as I have captured above.
Activate the Target image (B)
Go Edit/Image/Match Color.
Set the Source to (A) and adjust sliders to refine.


All image sources on this page are courtesy of AbsolutVision Photo Gallery.
