Load an image in Photoshop.
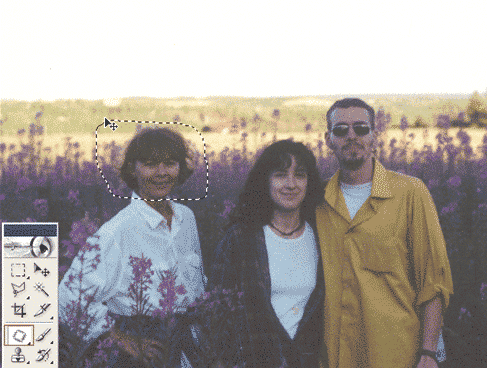
I will Eliminate the lady on your left using the ‘Patch Tool (J)’.

1. Select the Patch Tool from the toolbar, and begin drawing around the area you wish to eliminate.
In this case i started off small, since i only have a small area to the far left of it to mimic.

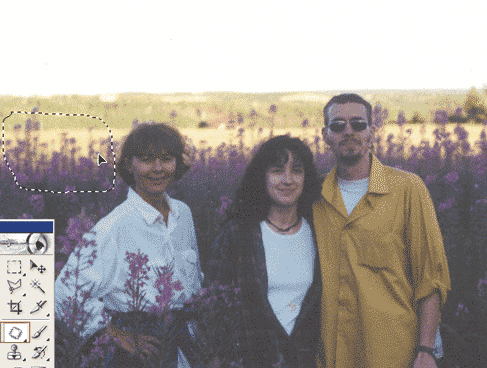
2. Once you’ve completed connecting the two end points to create a marquee selection (indicated by the ‘marching ant’s), with the ‘Patch Tool’ still selected, single click inside the ‘marching ant’s’ (now indicated by a solid black, white outlined arrowhead), then drag away to a new area you’d like to sample from. (As I have indicated here!)
Hold the Shift Key as you drag horizontal left to avoid any horizontal disfiguration.
Then let go of the of the mouse.

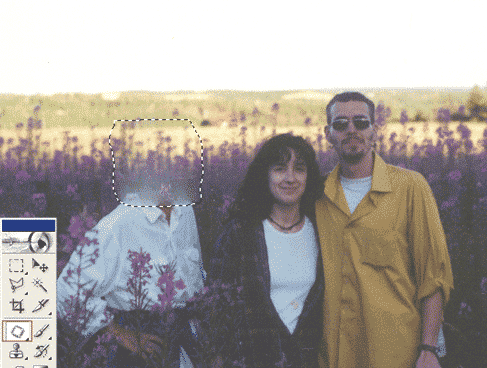
3. Photoshop will now clone the new sample area and snap it back into the area you started with. As you can see in my example.
Repeat the process #2 and #3, working your way down the area you wish to eliminate.
You may not achieve a smooth blend on every try so don’t be shy to undo and re-sample from another area of the picture to achieve a better affect.

Presto! Process of elimination complete.

