Here’s a few simple ‘Shape Tool’ tricks combined with ‘Blending Styles’ to achieve this 3d ring affect.
1. Start with the ‘Ellipse Tool (U)’ ![]() on the Toolbar, and activate the ‘Shape Layers’ icon
on the Toolbar, and activate the ‘Shape Layers’ icon ![]() up on the Options Bar.
up on the Options Bar.
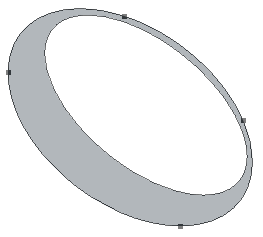
Then click and drag to draw an Oval shape and use ‘Ctrl + T’ (Mac: Command + T) to activate the Transform handlers. Then hold the Alt key (Mac: Option) to Free Transform to the shape that I have captured below.

Note: The Shape Color is not all that important at this point as long its different from your background for contrast. My shapes color is #B2B7BB.
2. Next, with the ‘Ellipse Tool (U)’ still active, select the ‘Subtract from Shape Area (-)’ icon ![]() on the Options Bar, and click and drag to draw a hollowed shape area as I have captured below.
on the Options Bar, and click and drag to draw a hollowed shape area as I have captured below.
Below is the screen shot of the Layers Palette.
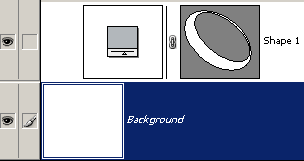
Note: I set the Layer Palette thumbnail size to large for the above screen shot for a clearer view. Step one and two clearly creates a Vector Mask, and no painting styles were applied up to this point.
3. Next duplicate the original Shape Layer, and change the Shape color to Black (#000000). And position it below the original Shape Layer, as I have captured below.
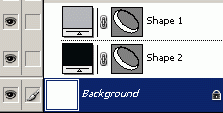
4. Next with the ‘Path Selection Tool (A)’ ![]() active on the Tool Bar, select and drag the inside path downward (or nudge with the arrow keys) to reveal some of the black from the vector mask layer. (As I have captured below)
active on the Tool Bar, select and drag the inside path downward (or nudge with the arrow keys) to reveal some of the black from the vector mask layer. (As I have captured below)
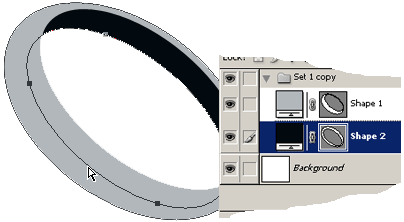
This completes the base shape of the ring, and the rest will be to apply ‘Blending Styles’ to the original Shape 1 Layer to apply the 3d affect.
5. Next Select the original Shape 1 Layer in the Layers Palette.
Then right-click (Mac: Control click) to reveal the context menu options and from the list choose ‘Blending Options’ and apply the below styles.

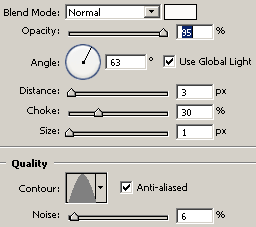
Inner Shadow Style:
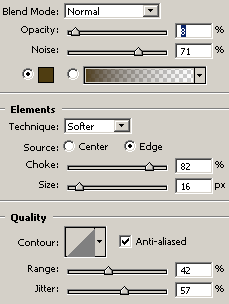
Inner Glow Style:
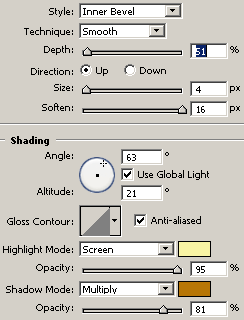
Bevel & Emboss Style: Highlight Mode Color: #F9F4A4 / Shadow Mode Color: #B77606
Contour Style:

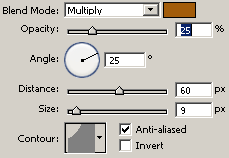
Satin Style: Blend Mode Color #A25C0A / Contour: Cove – Shallow
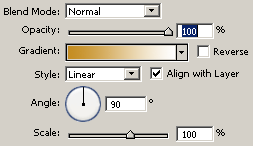
Gradient Style: Foreground Color #C48C20 to White #ffffff
Here is the Final Image
